New to GRE? A Step-by-Step Guide to ETS GRE Registration
Dear GRE Aspirant,
Are you someone who is planning to go abroad for your Master’s?
Do you have your eyes on a particular course at an international university?
To begin with, you should know that the admission process for any top institute requires two test scores, one Language test (to show English language proficiency) and one standardized test of aptitude, like the GRE (depending on your course and college, this test may vary).
The most common and widely accepted language tests are the following:
- TOEFL (for the US & Canada)
- IELTS (for the US, UK, Canada, European Union, Australia, & New Zealand)
- PTE (for the UK, Australia, New Zealand)
The standard tests include:
- GRE (for MBA or MS programs)
- GMAT (for MBA programs)
- SAT (for undergraduate programs)
- ACT (for undergraduate programs)
If you are looking for a Master’s abroad through the GRE and TOEFL or the IELTS, you have reached the right blog. A good GRE score is capable of getting you pretty envious admits at some of the best institutes in the world. The GRE General Test, for Master’s aspirants, is the most widely accepted test for graduate admissions at several graduate or business schools worldwide. In this post, I shall walk you through the entire process of booking your desired GRE slot for the test. Make sure you bookmark this page before starting with the registration process, so that help is at hand, whenever you need it!
The ETS (Educational Testing Service) is the organization that conducts the GRE. Their website (ets.org) is where students can create an account, register for GRE, and book a test date.
How to book a GRE slot for the computer-based test?
The procedure for GRE registration may appear long and confusing, but it is actually pretty simple, provided you follow the steps below and know what to do in case you’ve accidentally filled out any wrong information.
In this article, I shall be explaining in detail the process of creating an account on the ETS website and booking a test date, according to the availability.
Before beginning the process, make sure you have the following articles with you.
- A Valid Passport
- A Credit or Debit Card
ETS Registration in 3 Steps
Step 0: Head over to ets.org to create your account.

ETS GRE Registration
Step 1: Filling your Personal Information.
The name you type here, should be exactly how it is in your passport. Let’s say the name of the candidate is Jose Fernandez de Cordova
- First name/Given Name (your name as per your passport): Jose
- Middle Initial (if you have a middle name, then type the first letter of that Word): (Only if it is mentioned on your passport)
- Last/ Family Name (your surname exactly as mentioned on your passport): In this case, Fernandez de Cordova (Spell it without any accents or special characters)
- Fill in your Date of Birth, email address, and permanent address, with the help of the pop-ups appearing next to each field. Starred fields are mandatory.
- Fill in your contact details.
- Agree to the terms and conditions.
Follow the screenshots below for more clarity with the procedure.
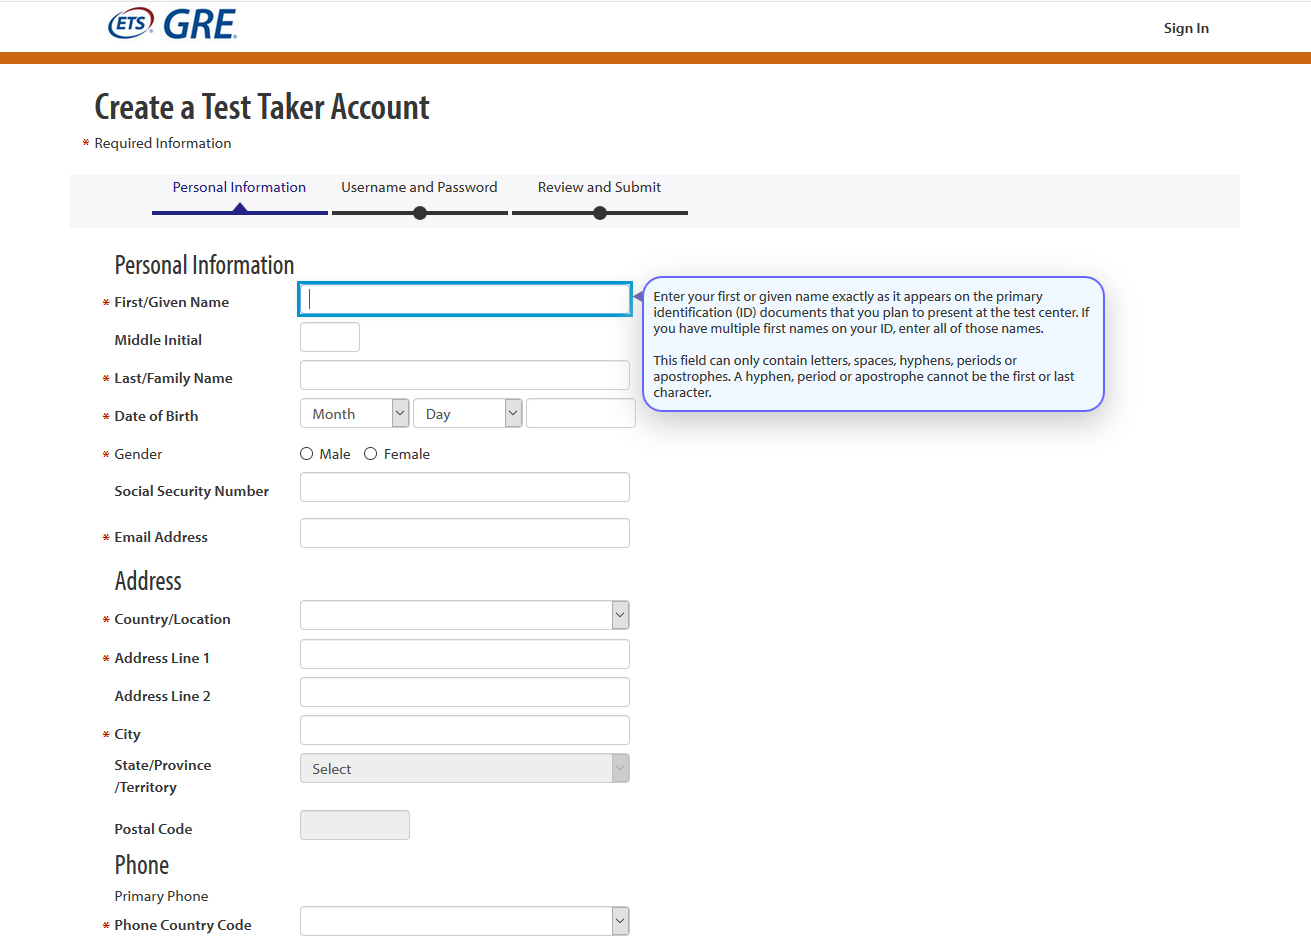
Create a Test Taker Account
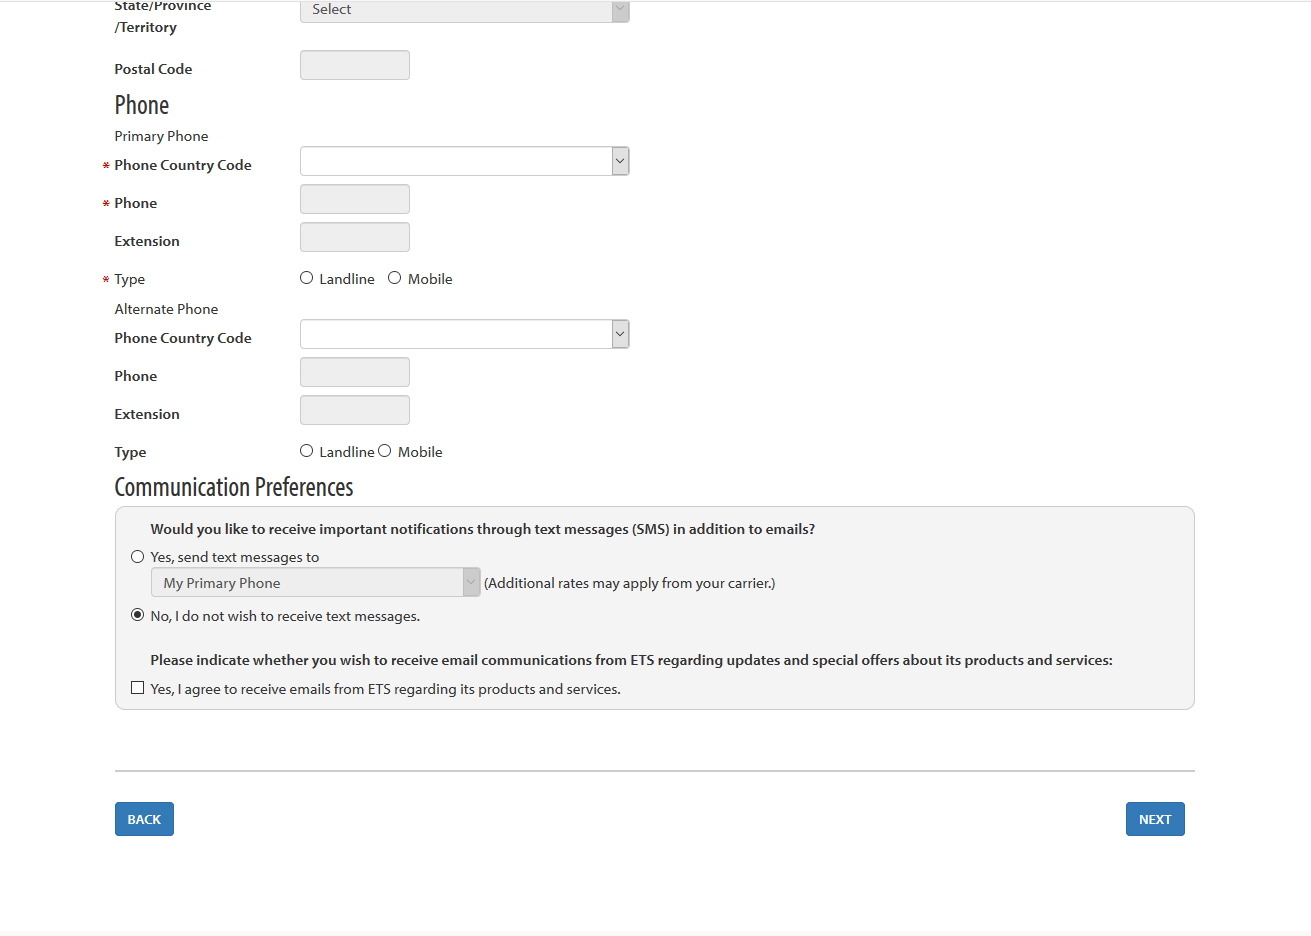
Fill in all the information.
Step 2: Setting your Username and Password.
- Enter a username and password of your choice.
- Set a security question.
- Agree to the terms and conditions and click on Next.
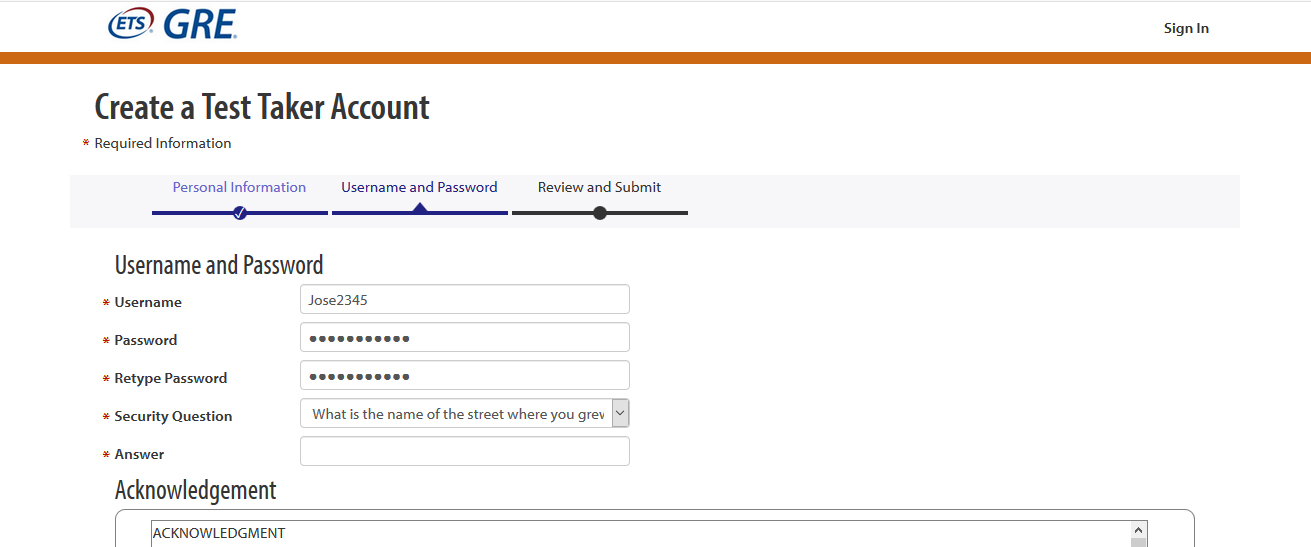
Set your Username and Password.
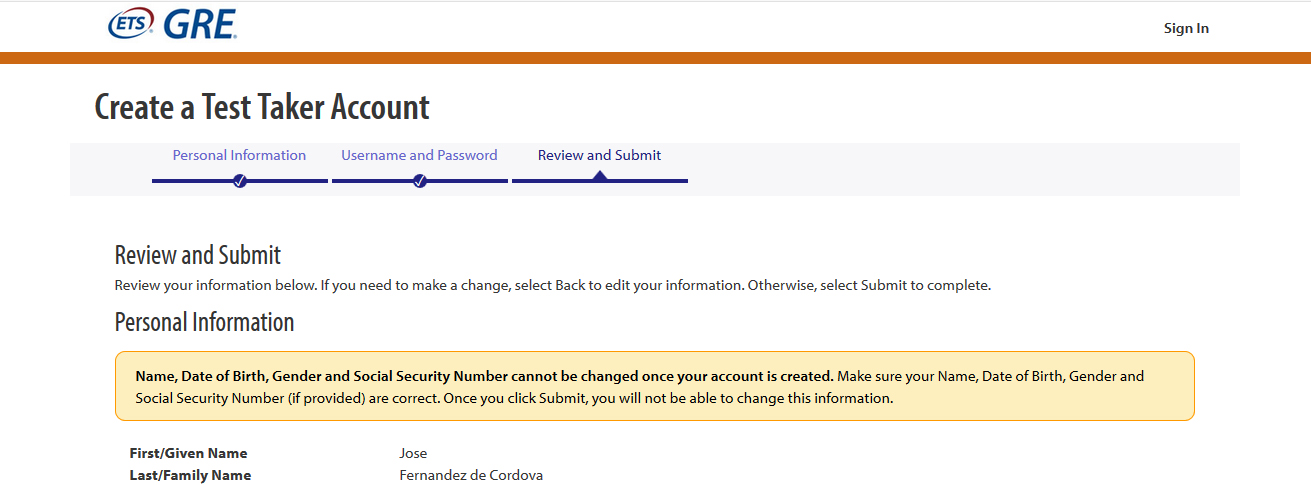
Step 3: Finally, Review and Submit your Information.
- Review the information that you have entered. If it needs correction, click on “BACK”, to make the necessary changes.
- Once you’ve verified the information entered by you, click on “SUBMIT” to proceed to the next step.

Review and Submit your Information
There you go! Your ETS Registration is complete and your account has been created. You are already halfway through the process!
Remember to check your email for a confirmation mail. If you can’t find the mail in your inbox, be sure to check the Spam and other folders.
Click Here to register yourself as the Test Taker.
- Now that your account is in place, you can proceed with the ETS GRE Registration process. Click on the Login button on the ETS website and enter the Username and Password you set for the site, under the “Returning Users” field.
- You’ll then be directed to the ‘My GRE’ homepage. On its top right corner, your name and ETS ID will be displayed. This page hence becomes a portal to view, modify, and access information pertaining to all the activities that will happen in the next few months. It will also display the link to your test scores after you’ve taken your GRE.
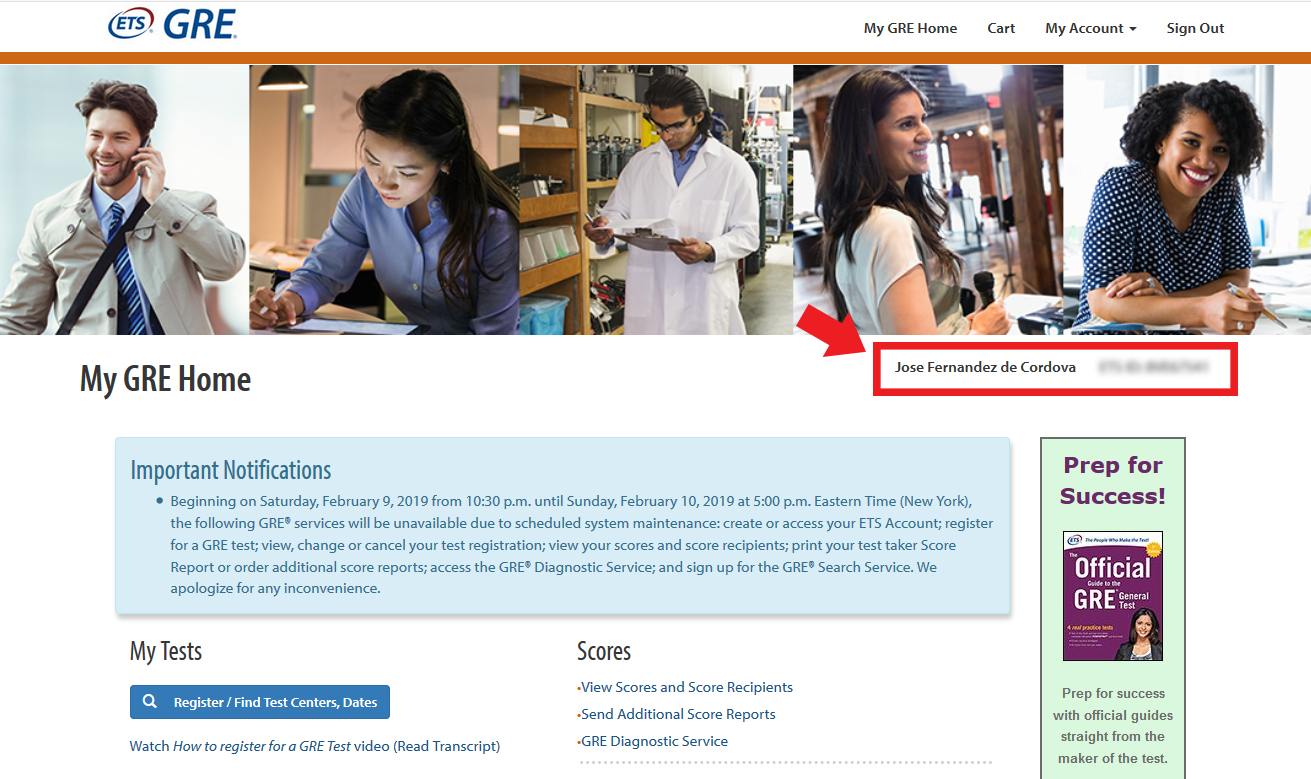
Next stop? Booking a test date!
Register for GRE in 10 simple steps
Follow the 10 steps to register for your GRE and choose the desired date for your exam. If you live far away from the nearest available test center, you should know when exactly to schedule your exam before you start the GRE Registration process.
Step 1: Click on the tab “Register/Find Test Centers, Dates” to continue.

Register/Find Test Centers, Dates
Step 2: Select the GRE General Test in the “Select a Test” drop-down menu.
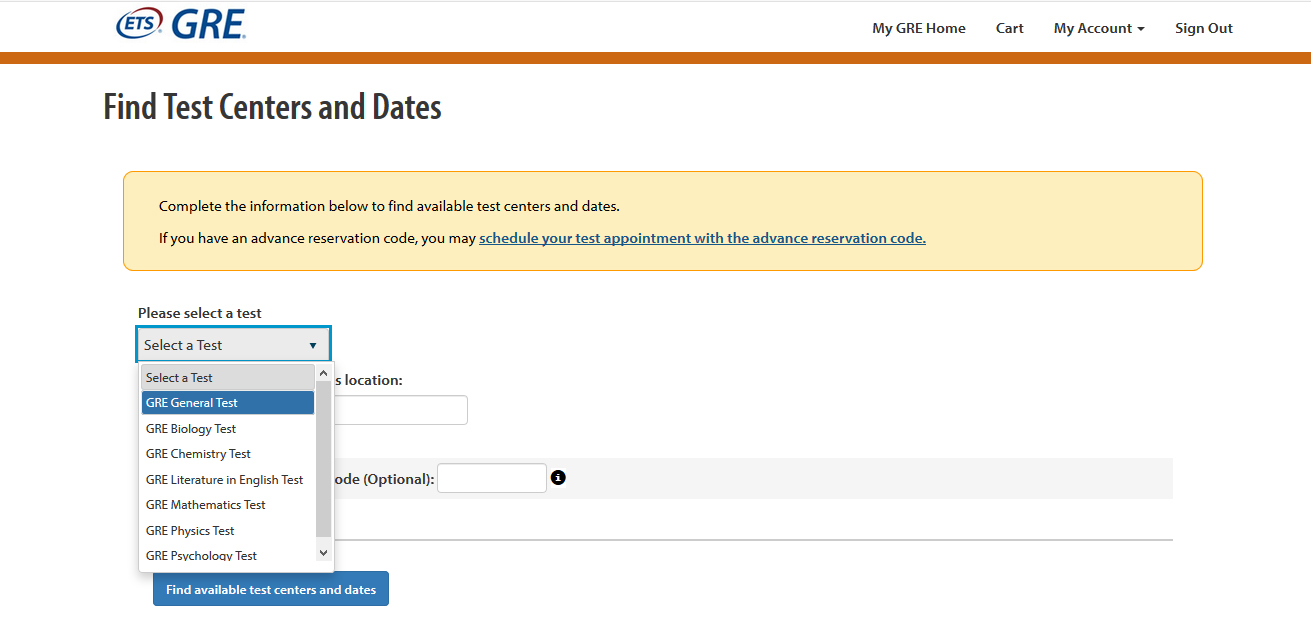
Select the Test Center and Date.
While the GRE General test is for Master’s Aspirants, the other course-specific tests offered by this site are:
- The GRE Biology Test
- The GRE Chemistry Test
- The GRE Literature in English Test
- The GRE Mathematics Test
- The GRE Physics Test
- The GRE Psychology Test
These are GRE Subject Tests that measure the knowledge of the test-taker in a specific field. The scores obtained through these Subject tests can supplement your application by emphasizing your knowledge in a particular field of study. It is for applicants who have an undergraduate major or extensive background in any of the above-mentioned disciplines.
Step 3: Set a Test Date
Use the arrows on either side to choose a preferred window for taking your GRE. Make sure to take into account your current preparation level, the estimated amount of time you’ll require to prepare for your target score, as well as the university deadlines, before finalizing on the test date!
Step 4:
Click on the blue tab titled, “Find available test centers and dates” to proceed with your test-date and exam center selection. Choose the center that is closest to where you stay.
Step 5:
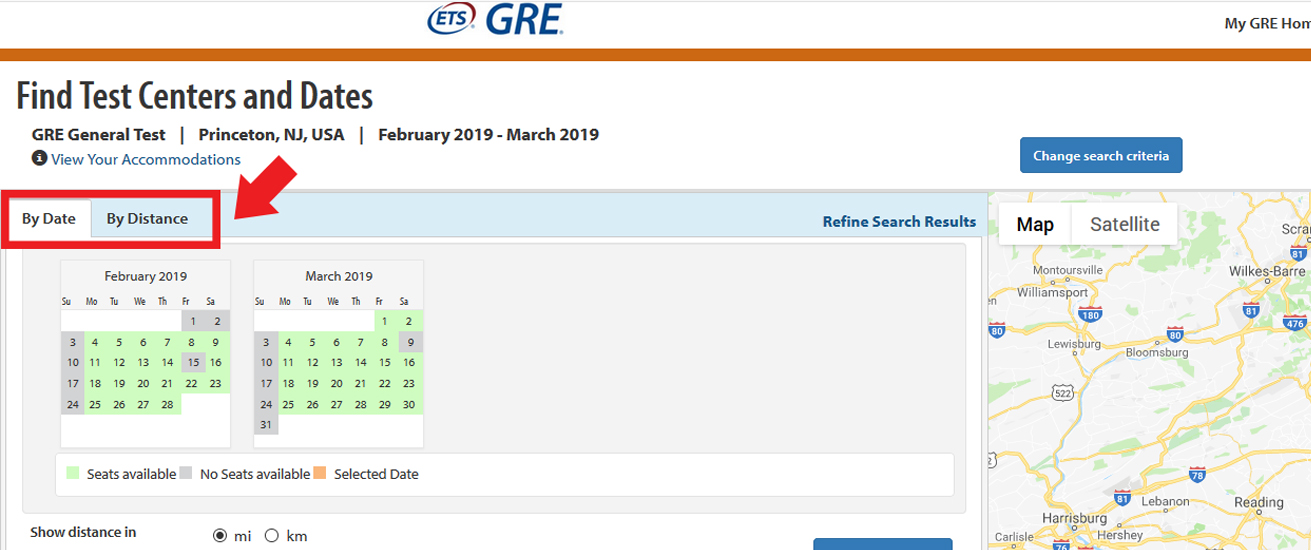
You can select the test center by preferred date or by the distance of the center from your location. Here, we will try to select the test center “By Date”.
- Click on your preferred date to see the time slots available.
- Select your preferred time slot and feasible location, and click on the “Register” button adjacent to it.
- Re-check the information you’ve submitted. If you wish to make changes, click on the blue tab that says “Edit Test Information”. Agree to the terms and conditions, and click NEXT to proceed.
- You can now review your GRE Test Registration details one last time before clicking ‘Submit’. In case anything needs modifying, click the “Edit” option on the right side and make the necessary changes, else, click NEXT.
Follow the screenshots below for more clarity with the process.
Find Test Centers & Dates.
i) Click your preferred date to see the available time slots.
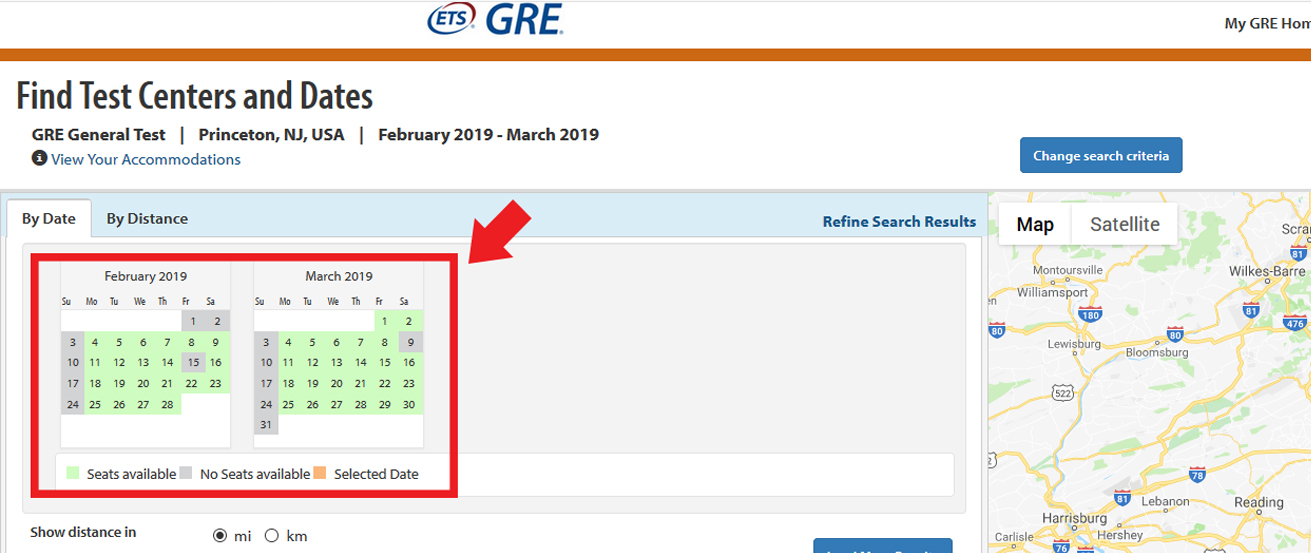
Test Centers and Dates details
ii) Click ‘Register’ next to your preferred time slot.
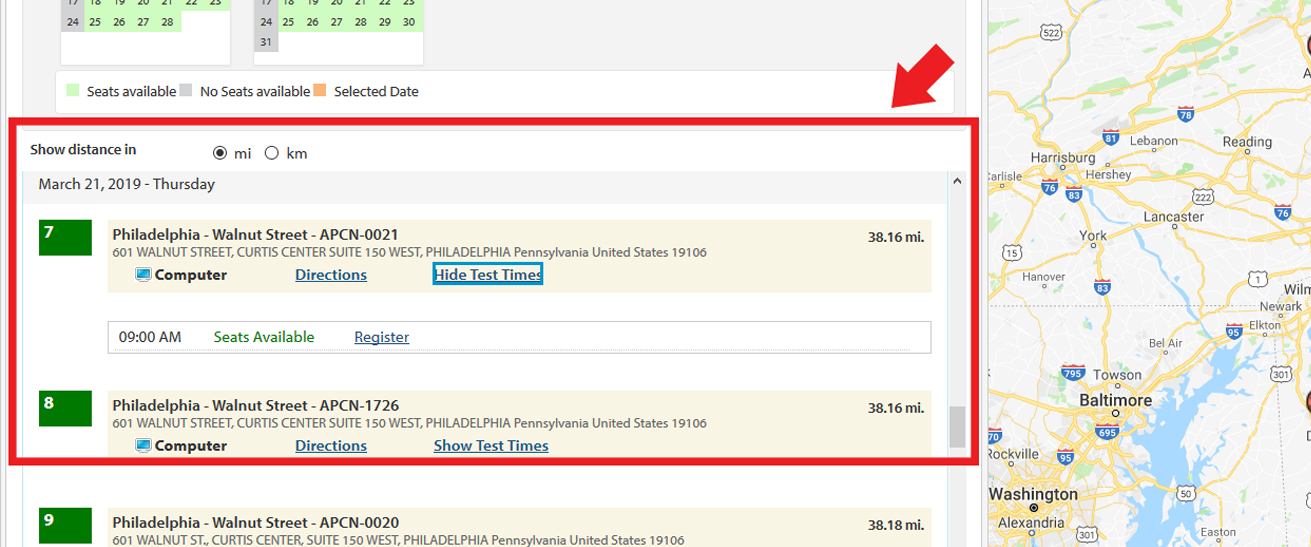
Set preferred time slot.
iii) Review your test center and date.
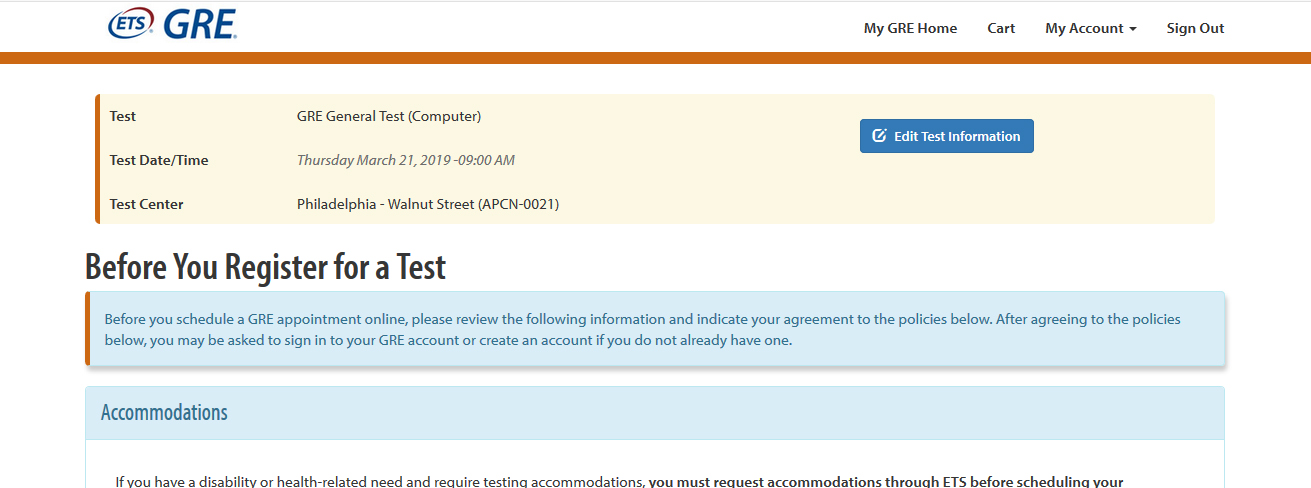
Review your test center and date.
iv) Review your Registration.
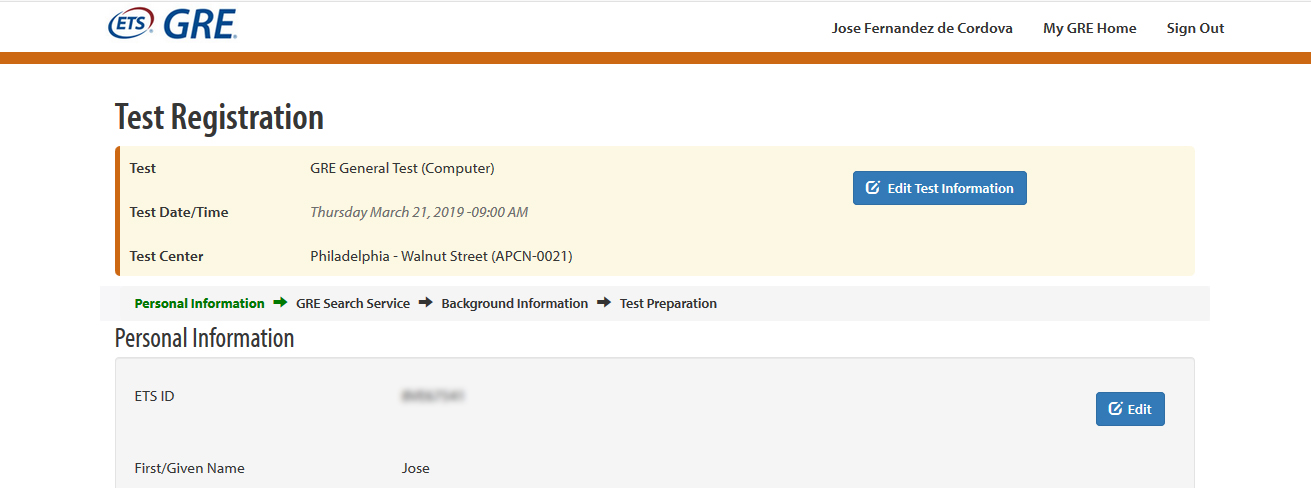
Review all registration details.
Step 6:
Go through the information about the GRE Search Service and select your preferences. It is a free service that can help connect prospective graduate students with universities, scholarship/financial aid sponsors, and other opportunities.
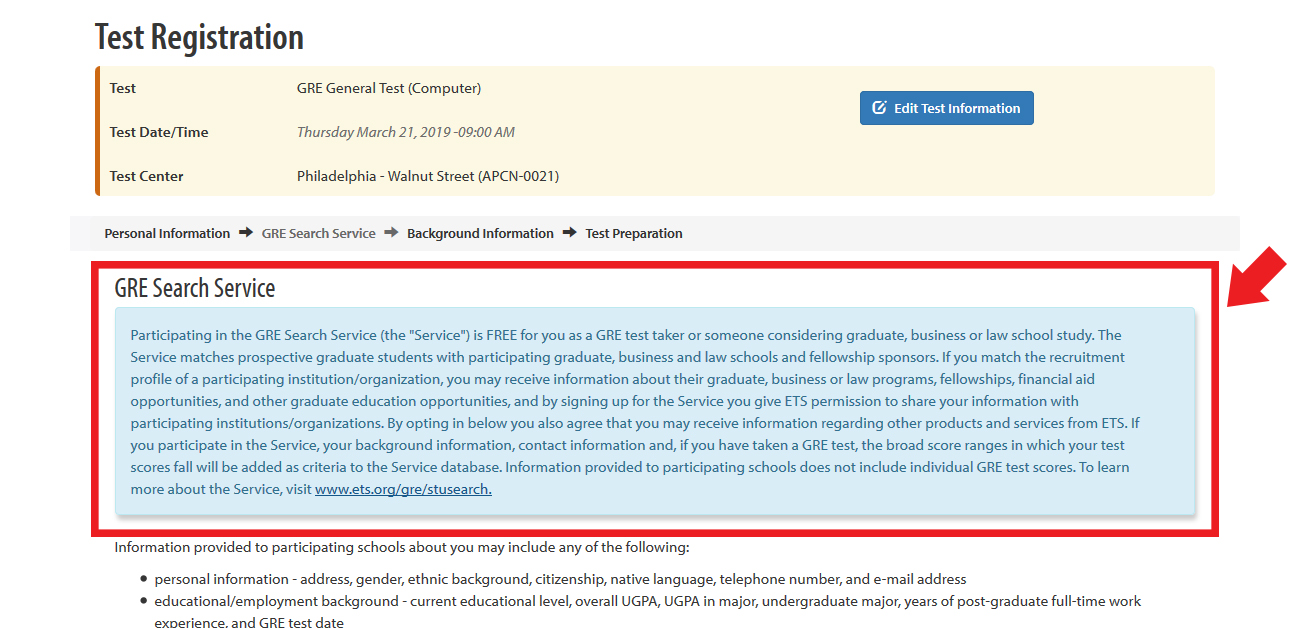
GRE Search Service
Step 7:
Filling in your background information.
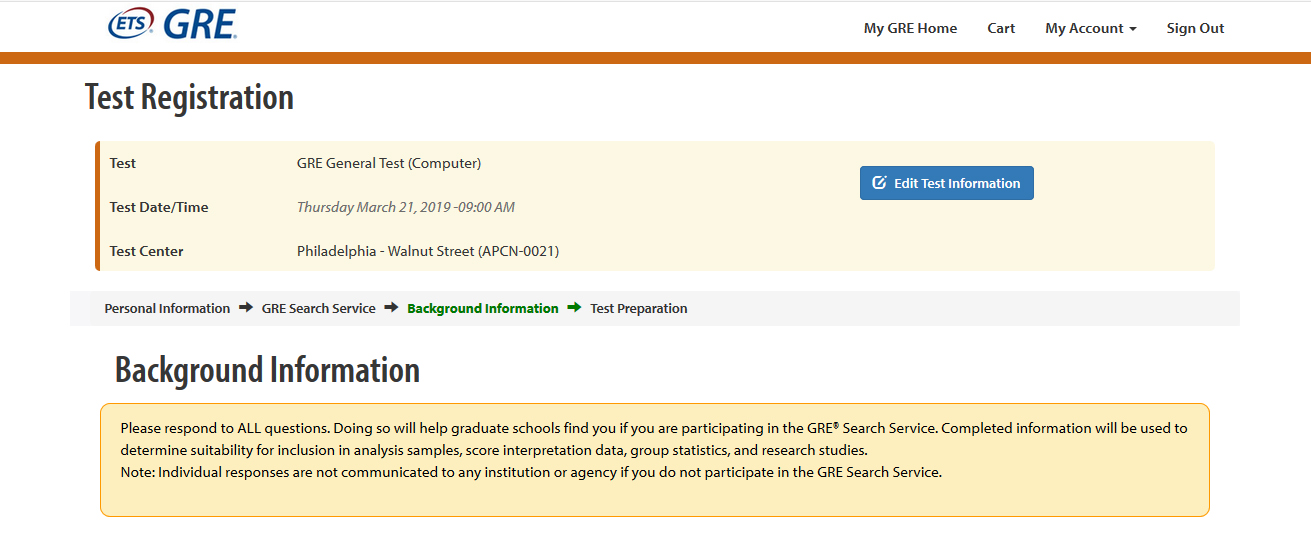
Fill in the Background Information.
Step 8:
Before checking out and making the payment, remember to take a look at the free Test Preparation Services offered by the ETS.
- Make sure you have added free services like POWERPREP Online to your cart along with any other services that you might prefer. These tests provide you with the simulation of the actual GRE and help you familiarize yourself with the test format and tools like the online calculator. They would help you to work on your weaknesses and know your strengths, and get an accurate idea of what awaits you on D-day.
- Once you have reviewed all the products and added all the other services you wanted to your cart, click NEXT to proceed with making the payment.
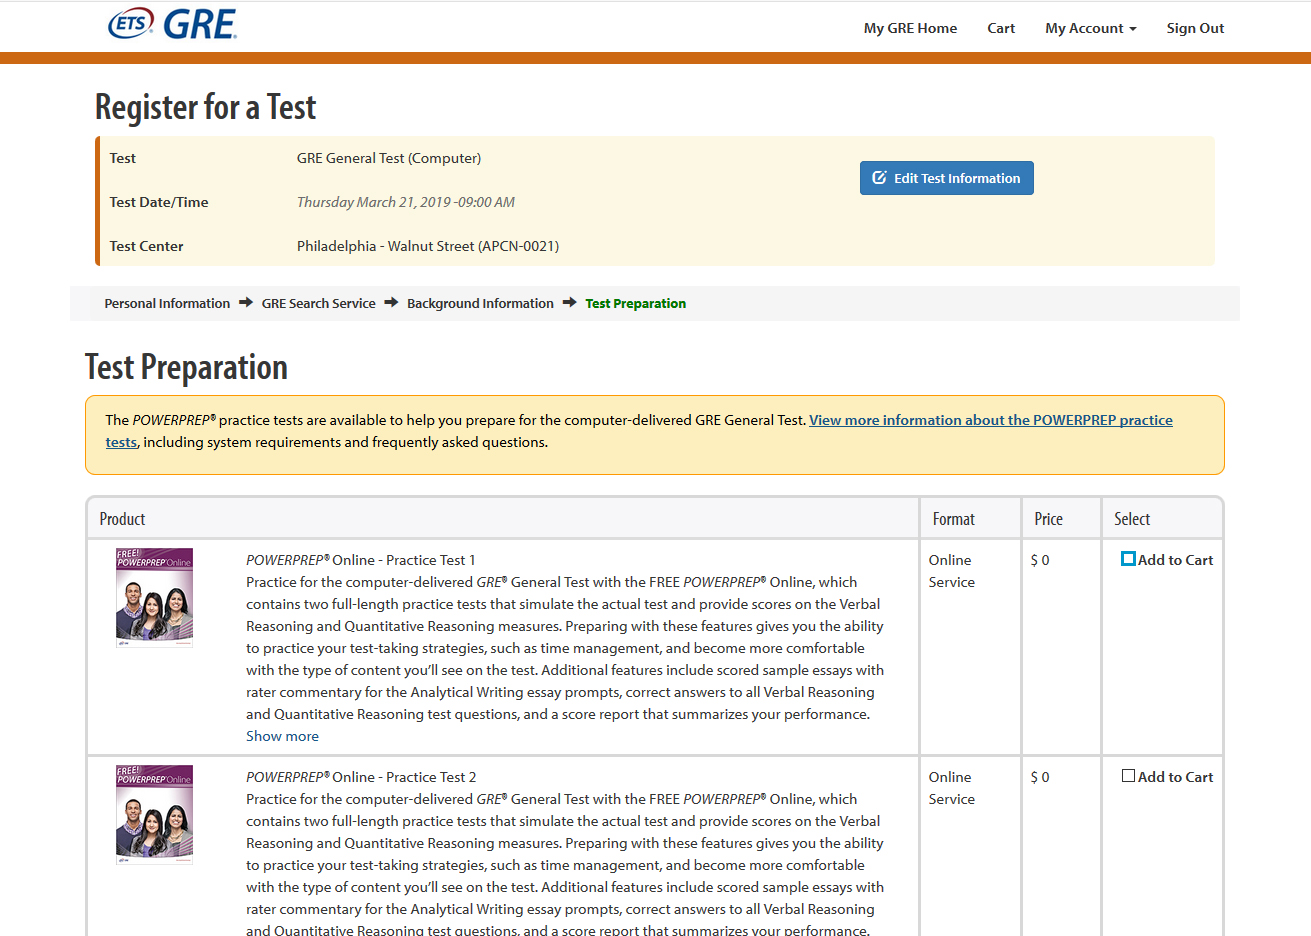
Test Preparation – POWERPREP
Step 9:
Review the items in your cart once again, and click on the tab “Proceed to Checkout” to enter your final page in the GRE registration process.
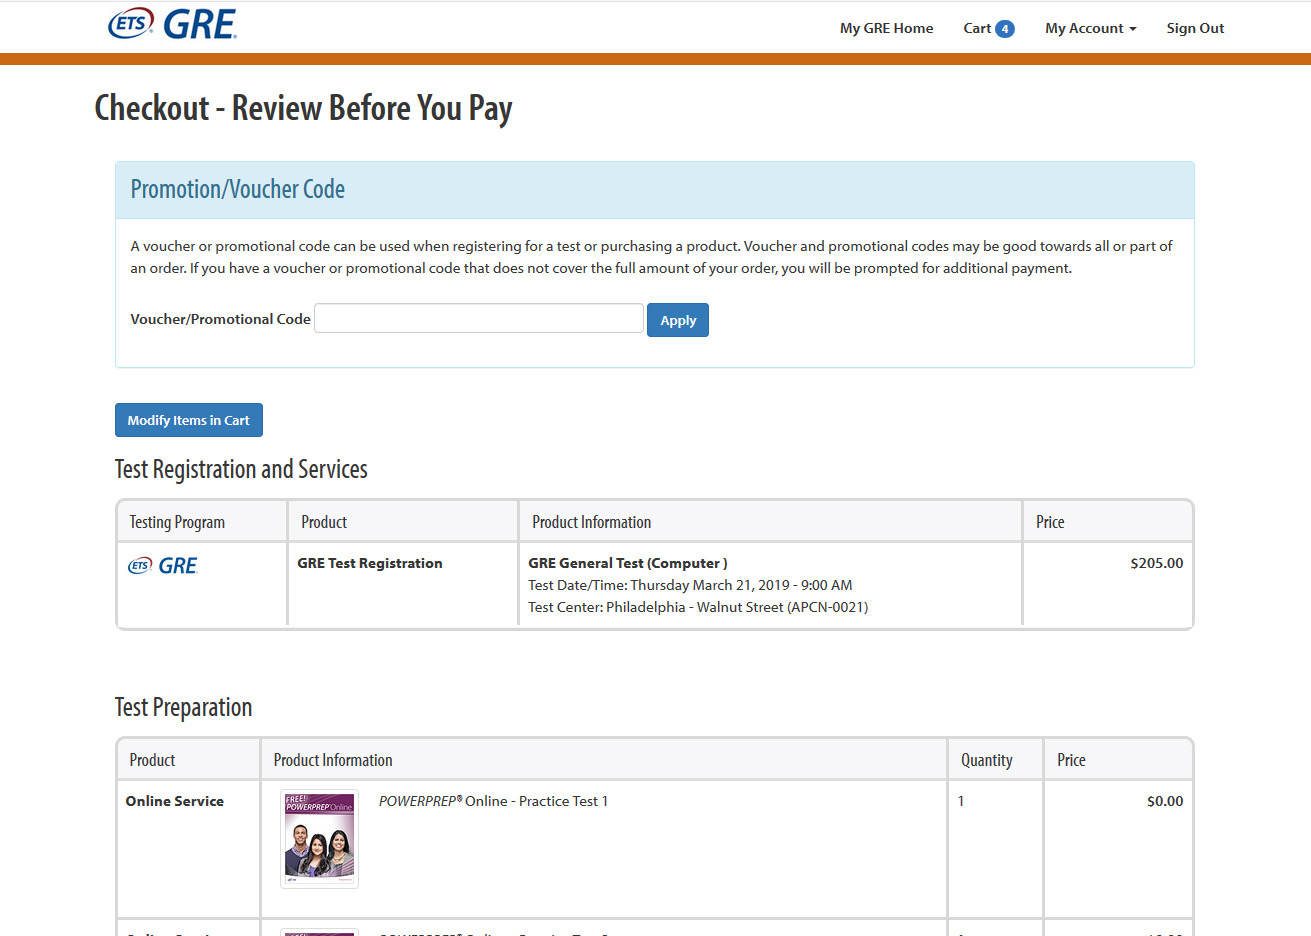
Proceed to check out.
Step 10:
Making the payment.
- Select your desired mode of payment, and proceed to the payment gateway by clicking “Continue”.
- Click on “Buy” after entering your credit/debit card details or any other method by which you wish to pay.
The ETS allows you to pay the $205 exam-fee using debit or credit cards, via PayPal, gift vouchers, or money orders/certified checks, in case you prefer offline modes of payment.
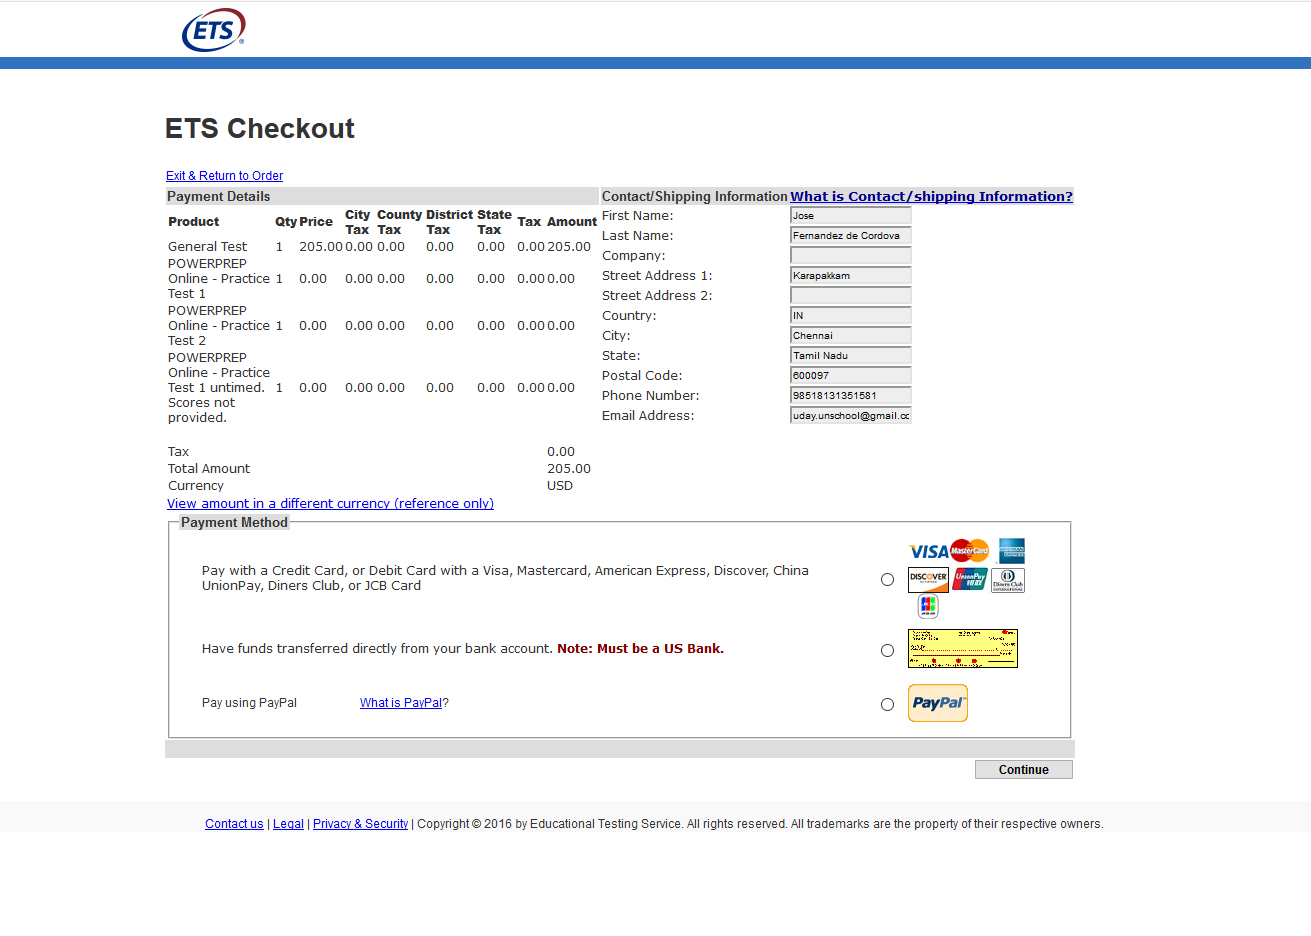
Payment – ETS Checkout
There you go! Your GRE Registration is now done. Remember to check the inbox of your registered email address for a confirmation message. Check the spam folder, if you can’t find it in your inbox.
FAQ for GRE Slot Booking
How to reschedule the test slot date for the GRE Exam?
Landing a desired date for your test can prove to be tough. However, while booking, if you are unsure about the options in front of you, it would be wise to take some time to calculate your variables before fixing the date. The process of rescheduling is simple, but will require additional fees. You can reschedule the test slot up until four days before the date of the exam that you had set earlier.
Following are the steps for Changing the Test date after GRE registration:
- Go to the ETS Home page.
- Click Sign In, under “Test and Products”.
- Click “Register for GRE Test” to proceed further.
- On the tab “Select a test”; select GRE General Test.
- Click the link “Reschedule or Cancel an Exam”.
- Enter the “Confirmation Number” sent to your registered email address after the GRE Registration process.
- After adding other information, click “Next” to proceed.
- Reschedule your test date by selecting another date or by choosing a three-month period option.
- Make the payment for rescheduling your test date.
- Make sure to check your mailbox for a confirmation mail containing the new test date and other details.
Can I modify my name after completing the GRE registration process?
No. You should make sure to fill in the details correctly according to the information printed on your passport. If, somehow, the mistake is already made, you can contact the ETS helpdesk and request assistance. If nothing works, you can always cancel your GRE registration and Register again.
If I enter incorrect information during the GRE registration, can I correct it later?
Most of the information that you enter can be corrected, except your Name and Birth Date, and hence, you must take extra care while filling in these two fields. However, it is advisable that you double check before proceeding, every step of the way, to prevent the hassle and confusion of having to make changes later on.
How to cancel my GRE registration?
The process of cancellation is similar to the process of rescheduling. Both require you to enter the confirmation number. Head over to the “My GRE Homepage” and click the heading, “View, Change, or Cancel Registration”. If you cancel your exam more than 4 days before the scheduled date, you can get a 50% refund of your initial payment.
Can I retake the GRE test?
Yes, definitely! If you are disappointed with your GRE test scores, you can take it again; in fact, you can take it multiple times. Within a duration of 12 months, a student is allowed 5 attempts at the GRE. However, there should be at least 21 days’ gap between two successive attempts.
What is ETS Powerprep?
ETS offers a set of online practice tests for the preparation of computer-delivered GRE General Test. GRE Powerprep helps test takers to familiarize themselves with the test pattern and tools available. These tests help you plan your preparation strategy by bringing to your attention your strengths and weaknesses. The simulation of the test, along with its time constraints helps you to develop your speed and understand the scoring process better. These tests are free and you can add them to your cart when registering for the GRE.
A few other pointers to keep in mind before you dive into the process of GRE Registration
-
- My GRE is where you commence the registration process, no matter which country you belong to.
- There are limited seats and fewer test slots for GRE exams outside the USA, so remember to register well in advance.
- Your Name and Birth Date cannot be corrected once submitted, so make sure you pay extra attention while filling these two fields.
- Rescheduling your test date and cancellation are both chargeable, so finalize your desired test date after thorough contemplation.
Keep a relaxed mind throughout the registration process. It can be a bit lengthy and monotonous, but do make sure that you cross-check any information you enter at least twice before proceeding to the next step. Keep this guide handy, if you feel it can be of help. If my answer has been of assistance to you, make sure to give it an Upvote! Have any doubts? Leave them as comments and I’ll get back to you at the earliest!
All the best with your GRE!